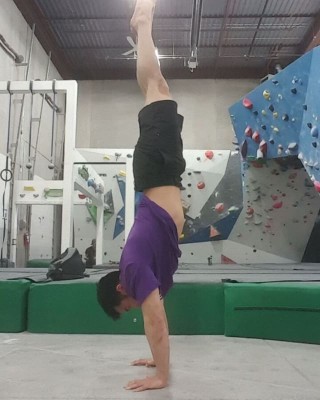
Life is better upside down. I&;m starting a challenge for myself to see how much I can improve. This is day one (I&;ve been training for a few months already but not consistent!) Most of my improvements have come from wrist and shoulder mobility drills such as the ones I&;ve shown in my and skin the cats for my shoulders. The handstand requires both good awareness of where your body is in space and is a feat a muscular endurance. Try it out after a wrist warm up (find a soft surface or kick up against the wall). It&;s a great shoulder and core workout! culture posted on March 16, 2017 by Dr. Jonathan Leung | No comments by
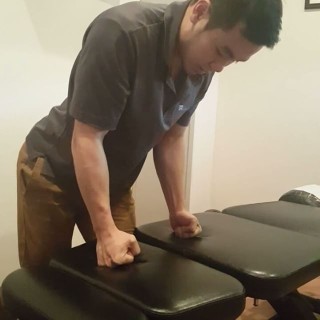
Ulnar / radial deviation fist or patent pending URDF! This is both a wrist mobilization and a strengthening exercise I use as part of my wrist sequence. It is using what&;s known as a closed kinetic chain (the hand is fixed against the ground) eccentric movement(you contract your muscles while they lengthen) The more weight you apply with your body the more tension there is on your muscles. Start off with minimal bodyweight and slowly progress through the motion feeling the end ranges of your wrist. This exercise is great used as a warmup before crushing and to bulletproof your wrist. You can also use it after the sharp pain subsides with a series posted on March 14, 2017 by Dr. Jonathan Leung | No comments by
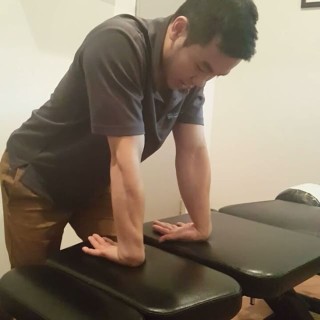
This is a basic wrist flexion stretch which will help build the foundation of mobility required in the wrists for things such as on the rings. This stretches out the extensor group of muscles and tendons located on the outside and backhand side of your arm. The tendons responsible for extension of your fingers and wrist originate at a common origin known as the lateral epicondyle of your arm near the elbow. This is the overused muscle group in or lateral epicondylitis! Here I&;m performing 5s hold with pulses and slowly changing the angles at which I press at to target different areas of the wrist. I do this by rotating my elbows slightly further or less. You can also try and perform 3-5 reps of 15s isometric contractions and relax periods of 30s. (Once again you want to try and spend a minimal total of 90s in the stretch)When performing a static isometric stretch you assume the position of the stretch to target the muscles of the forearm, then you tense the muscle against the floor (without actually moving!) Hold that muscular tension for 15s, then relax for about 30s. Rinse and repeat until your desired length! Happy stretching. series posted on March 2, 2017 by Dr. Jonathan Leung | No comments by
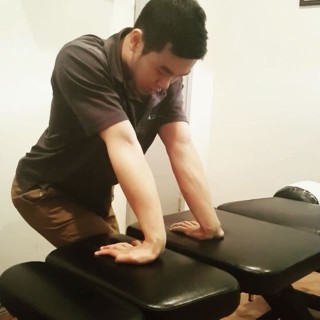
This is a basic wrist extension stretch which will help build the foundation of mobility required in the wrists for things such as . This stretches out the flexor group of muscles and tendons on the palm side of your arm. I like doing 5s hold with pulses and slowly changing the angles at which I press at to target different areas of the wrist. I do this by rotating my elbows slightly further or less and with most of my stretching I try and perform 20 reps of 5s pulses or a minimal total of 90s. This is a type of stretching that encorporates what&;s known as proprioceptive neuromuscular facilitation stretching or PNF. It enhances both active and passive range of motion in order to improve motor performance and aid rehabilitation. The specific type of PNF I am using here is a &;Contract Relax&; technique. practor series posted on February 4, 2017 by Dr. Jonathan Leung | No comments by
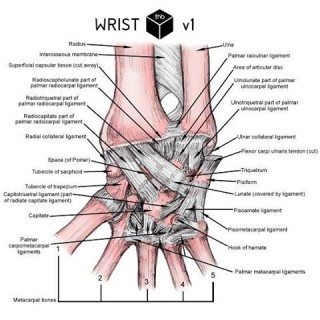
The wrist is a complex joint that bridges the forearm to the hand – a collection bones from the forearm (radius, ulna), 8 carpal bones, and 5 metacarpal bones, an articular disc (Triangular fibrocartilage complex or TFCC) and a plethora of ligaments. Then throw in muscles that all have very specific attachment points. Let&;s not forget about nerves arteries and veins. As you can see the wrist is a quite complicated. In the following weeks I will be posting 5 stretches and mobility exercises but if you have an ongoing issue this is not to replace a wrist assessment by a health professional! Work smart. Loose ligaments need muscular strengthening, tight muscles need stretching, weak muscles need strengthening, focus on each exercise to maximize your motor control and don&;t just go through the motions. practor series posted on December 29, 2016 by Dr. Jonathan Leung | No comments by
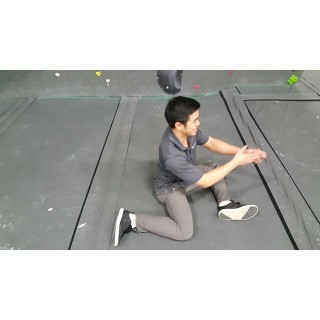
Hip 9090 active version. Try and hold for a few seconds longer. I was a bit rushed. @3dwinchang markham toronto mobility posted on October 14, 2016 by Dr. Jonathan Leung | No comments by
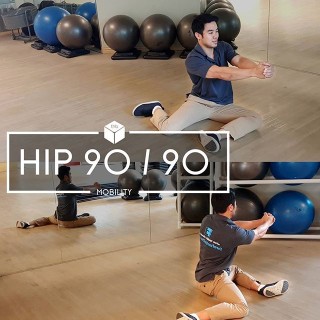
The Hip 90/90. A hip mobility exercise you can easily incorporate into your life. For the next 20 days try and spend 2 minutes in this position. Slowly bring your chest towards your knee while keeping your shoulders squared. You can make it more tough and drop your elbow towards the floor equally. This stretch can be done statically or actively for 10 reps, holding each rep for 3 seconds. To do this actively, slowly lift the knee on one side and try to point it into the opposite direction. I&;ll post a video next! markham toronto mobility posted on October 12, 2016 by Dr. Jonathan Leung | No comments by
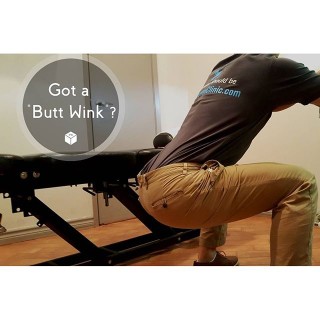
What is Butt Wink?The &;butt wink&; or posterior pelvic tilt – the pelvis pulls the lumbar spine into flexion or rounding of the low back putting you in a vulnerable position. You want to remember to – keep an arch – prevent that spinal rounding. Otherwise you risk damaging ligaments, causing disc irritations or herniations. What Causes Butt Wink?A number of factors combined together can cause the butt wink which leaves your low back and hips vulnerable. This can be hip capsule tightness, hip flexor tightness, knee issues, ankle or even big toe limitations.One limitation is where the head of the femur articulates with the acetabulum. The only way to go deeper is to round the pelvis and the lumbar spine – this is anatomical – this will be different between individuals.Stretching can help partially – think of the hamstring, it crosses both the hip and the knee joint – as you bend your knee flexes, and the overall tension from the hamstrings does not usually prevent you from going into a deeper squat.You can improve your hip flexion mobility over time.You can also improve your squat depth over time.What can we do?Motor control – motor control is imperative – the squat is a complex compound exercise that forces muscles to work in concert. As you improve your proficiency – your squat will improve. The mobility exercises I&;ve posted previously can help – but its best to first figure out what you need to work on. Then focus your work there. Work smart. Check out my future posts for more mobility drills. posted on September 7, 2016 by Dr. Jonathan Leung | No comments by
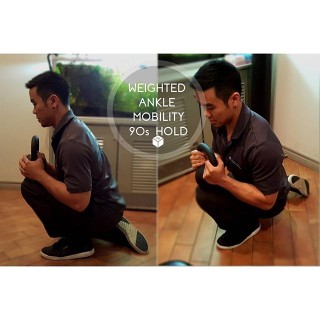
Some of you have trouble getting down with your heels on the floor into your deep squat. One of your limitations may be at your ankle. If you lack mobility at the ankle, the limitations of the movement affect the joints above it changing your motion.This weighted ankle mobility drill I use helps me clear some of my ankle restrictions. First I get a heavy weight and place it onto my knee and shift forward while trying to keep my heel flat on the floor. Try and hold this for ~90s or so, and as your ankle begins to loosen up start to methodically shift forward further to add more motion through the joint. Try the deep flat footed squat then this mobility drill and test it again and enjoy your mobility! markham toronto everydamnday posted on August 11, 2016 by Dr. Jonathan Leung | No comments by
Taking a break from your day of sitting at a desk, your weary day of travels in search of pokemon, or worse, sitting around and farming pokemon and pop a PokeSquat:Keep your feet FLAT – heels on the ground, don&;t let it lift up! align your knees over your feet, lower yourself slowly and rest your arms on your knees. Spend 10 minutes in this position and give your body a break by:1) reducing spinal compression – reduce low back discomfort2) Increasing hip mobility3) Increasing knee mobility4) Increasing ankle mobility5) Helps you go trouble getting into this position? Can&;t hold it long? Practice practice practice – it will improve over time. If this movement seems ridiculously hard – Congrats! You have a mobility issue. Finding a problem is the start. Let&;s get to work. posted on July 27, 2016 by Dr. Jonathan Leung | No comments by